
Quick Answer
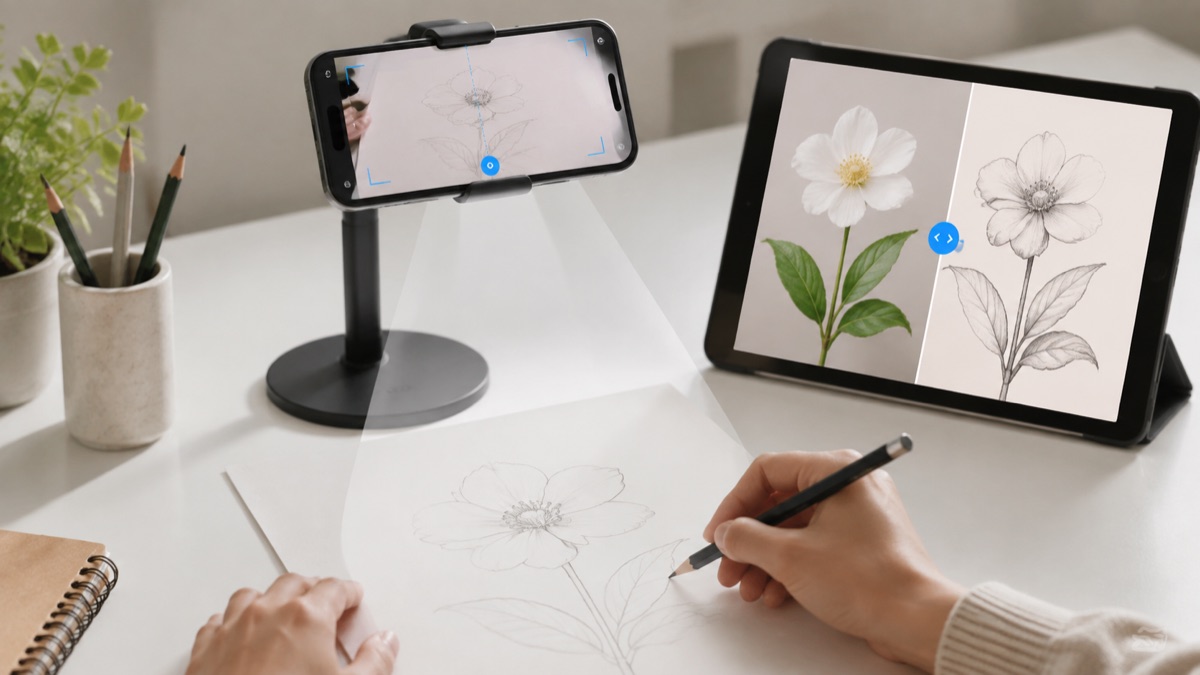
An AR drawing app lets you view a reference on your phone while the camera shows the paper underneath. After you secure the phone above the page, you position and fade the on-screen image until its lines are easy to follow. Then you trace the largest shapes lightly, add smaller details, and finish the drawing without the overlay. The most important parts are a stable phone, even lighting, paper that cannot slide, and a reference with a clear outline.
Open How to Draw for AR tracing, step-by-step lessons, and paper practice on iPhone or iPad.
How AR Tracing Works
Augmented reality combines a live camera view with digital content. In an AR drawing workflow, the phone becomes a modern drawing aid: you see the paper through the camera and a reference image on the same screen. The overlay is a guide for your hand; it is not a physical projector shining light onto the page. This distinction matters because you need to look at the screen while drawing on the paper below.
The basic idea resembles a camera lucida, an optical drawing tool that lets an artist see a subject and the drawing surface together. A phone makes the setup more accessible because you can resize, rotate, reposition, and adjust the opacity of a reference. If you want a shorter setup checklist, keep the AR drawing phone setup guide open alongside this article.
What You Need Before You Start
- An iPhone or iPad: make sure the camera lens is clean and the device has enough battery for the session.
- A stable overhead support: use a phone stand, clamp, tripod arm, or another secure mount. Do not balance a phone on books where it can slide onto your hand or paper.
- Plain paper: start with standard white drawing or printer paper. Tape two corners with removable tape if the page moves.
- A pencil and eraser: an HB or 2H pencil is useful for light construction lines. Save darker pencils, markers, or colored pencils for the finish.
- Even light: use a desk lamp or daylight that illuminates the page without creating a hard phone shadow.
- A simple reference: choose bold contours and limited detail for your first attempt.
How to Trace a Picture on Paper With Your Phone
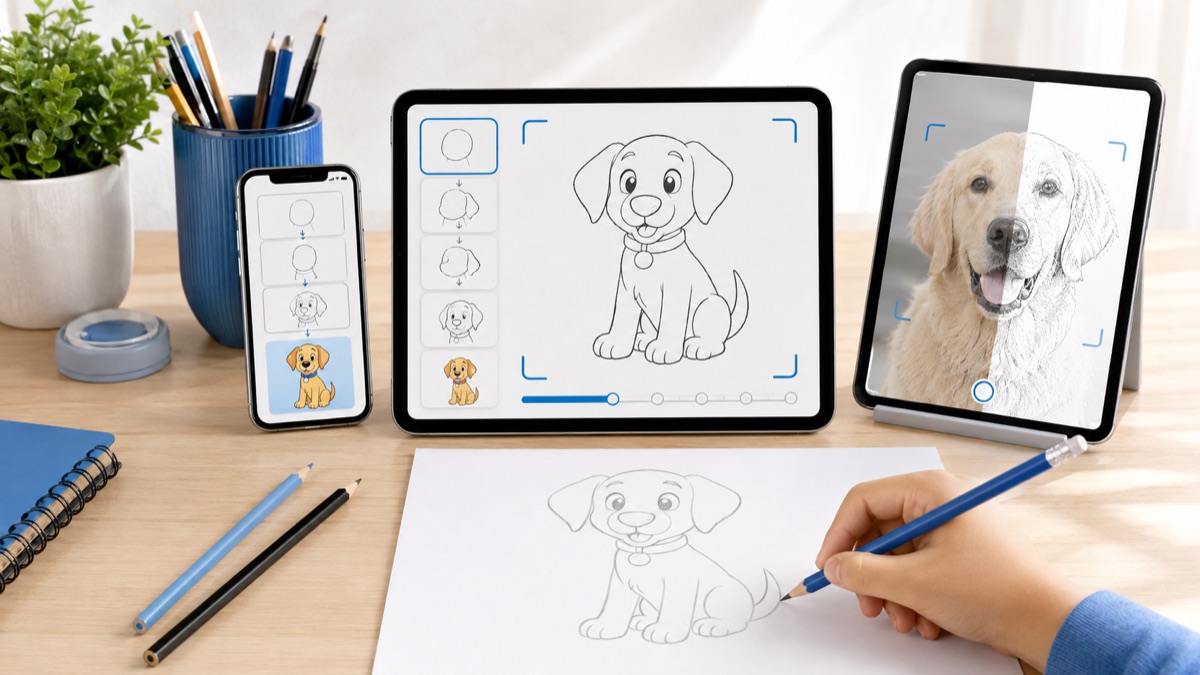
- Choose a reference. Pick a flower, animal, simple object, or cartoon-style subject with an obvious silhouette. Crop away unnecessary background details.
- Place the paper. Work on a flat, non-glare surface. Secure the top corners so the sheet stays in the same position.
- Mount the phone. Position the camera above the center of the page. The phone and paper should be as parallel as possible; a strong tilt can make one side of the drawing look larger than the other.
- Open AR mode. In How to Draw, open the AR or projector-style drawing tool and allow camera access when prompted.
- Frame the page. Move the mount or adjust the camera view until the full drawing area is visible. Avoid zooming so far that small hand movements become difficult to judge.
- Resize and rotate the overlay. Fit the reference within the page margins. Leave space around the subject for your hand and for later details.
- Lower the opacity. The reference should be visible but not so dark that it hides your pencil line. A medium transparency usually makes both layers easier to distinguish.
- Lock the setup. Tighten the mount and stop changing the scale once you begin. If available on your device, Guided Access can keep the phone in one app during the session.
- Trace big shapes first. Mark the top, bottom, left, and right edges of the subject. Connect those points with light, short strokes.
- Add details and finish freehand. Trace only the details that define the subject, then hide the overlay. Correct awkward lines, vary line weight, add texture, and erase construction marks.
How to Get Cleaner, More Accurate Lines
Accuracy comes from stability and checkpoints, not from pressing harder. Hold the pencil farther back than you would for handwriting, keep your grip relaxed, and pull longer curves from the elbow or shoulder. For tight details, use shorter strokes from the fingers. Rotate the paper only if you can return it to exactly the same position; otherwise, rotate the digital reference before you start.
Trace structural information first: the silhouette, center line, major angles, and the position of key features. A portrait needs the head shape and placement of the eyes, nose, and mouth before eyelashes or hair strands. An animal needs the body masses and joint positions before fur. This order keeps the drawing useful even if you decide to stop tracing early.
Try not to chase every pixel in a photograph. Simplifying a reference into a few deliberate lines is part of drawing. A photo-to-outline workflow can help when a busy image has too much texture; see the photo-to-sketch drawing page for that approach.
Common AR Drawing Problems and Fixes
The overlay drifts away from the pencil line
First check the physical setup. A flexible mount, moving paper, or a bumped table causes more trouble than the drawing itself. Tighten the stand, tape the page, and use the four-dot calibration test. Good lighting also helps camera-based tracking because the phone can see the surface more clearly.
Your hand blocks the reference
Raise the phone slightly so more of the page fits in view, and move the overlay away from the edge of the paper. Work from the side opposite your drawing hand: right-handed artists can begin on the left, while left-handed artists can begin on the right. Short breaks also make it easier to notice when your hand position has changed.
The traced drawing looks stretched
The phone is probably not parallel to the paper, or the paper is not centered below the camera. Level the device and check that all four corners of the page look proportionate on screen. Recalibrate before adding details; otherwise, you may faithfully trace a distorted view.
The screen keeps dimming or leaving the app
Charge the device, temporarily adjust the display timeout if appropriate, and reduce interruptions before starting. Apple’s Guided Access feature can restrict an iPhone or iPad to one app, which is also useful when a parent shares a device with a child. Restore your usual settings after the session.
Use Tracing as Practice, Not the Finish Line
Tracing is most valuable when it teaches you what to notice. After one guided version, draw the same subject again with the finished sketch beside you and the overlay turned off. On a third attempt, use only the original reference. This trace, observe, redraw sequence converts a supported task into an independent one.
You can also limit each tracing session to one skill. Trace only the outer contour of a flower, then invent the petal details. Trace the proportions of a face, then shade it from observation. Trace the perspective edges of a car, then design different wheels and colors. The goal is to borrow structure while making decisions of your own.
Keep the sessions short enough to stay attentive. Ten to twenty minutes is often more productive than finishing every detail while tired. A J. Paul Getty Museum drawing activity similarly asks students to sketch from imagination and then from observation, comparing what changes when they look more carefully. For a broader beginner routine, read How to Draw: Beginner’s Guide to Easy Drawing Techniques.
AR Tracing Tips for Kids and Families
An adult should secure the phone mount before a child begins. Keep charging cables away from the drawing area, place the setup on a stable table, and choose a large, forgiving reference. Young beginners usually do better with a smiling sun, simple animal, flower, food character, or vehicle than with a detailed portrait.
Praise the child for noticing shapes and completing the process, not for matching every line. If the result feels frustrating, increase the image size, reduce the detail, or trace only three anchor shapes. The related How to Draw for Kids guide includes more playful prompts and a repeatable family practice routine.
Related Drawing Guides
- AR Drawing Phone Setup Guide
- AR Drawing App Overview
- Trace Drawing App for Paper Practice
- Drawing Projector App Setup
- How to Draw for Kids
- Beginner’s Guide to Easy Drawing Techniques
References
- Apple Developer: Understanding World Tracking
- Apple Support: Use Guided Access on iPhone or iPad
- J. Paul Getty Museum: Recording Nature’s Nuances
- The Metropolitan Museum of Art: Inventing a New Art
Download How to Draw, choose one clear reference, and turn a phone-guided outline into your own finished drawing.