
Quick Answer
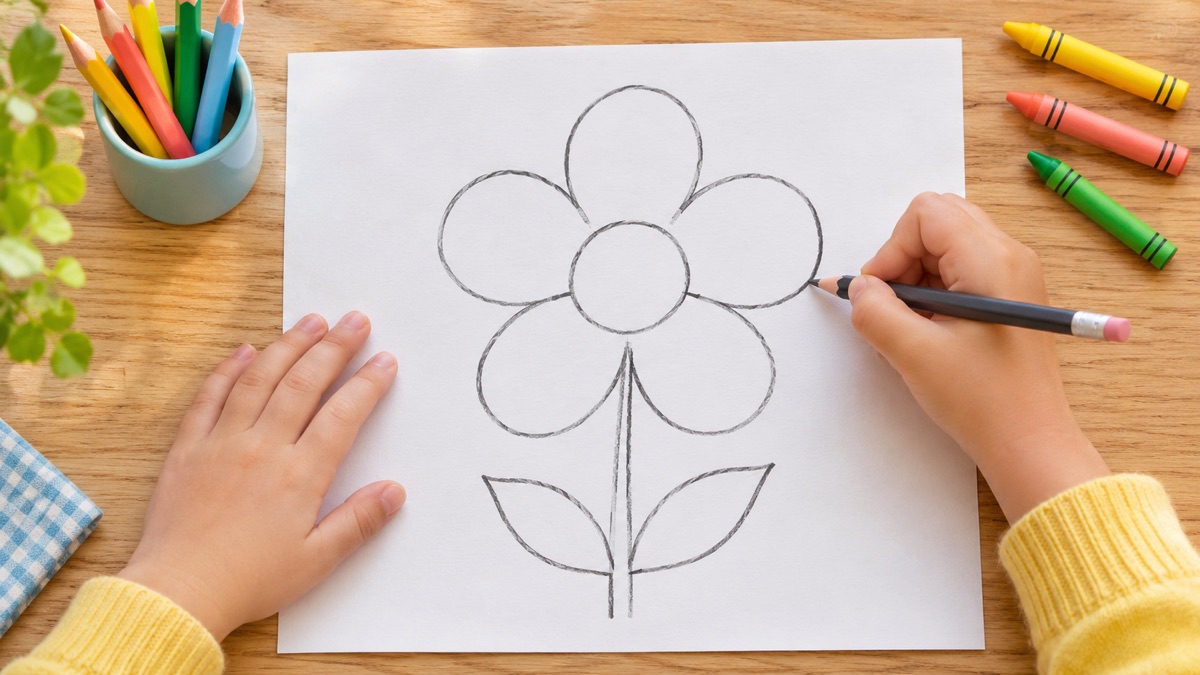
For an easy flower drawing, start with one circle for the center. Add five large oval petals around it, draw two parallel lines for the stem, and place one leaf on each side. Trace the clean outer edges, erase the construction lines, and add color. Keep every first line light so the flower can change as you work.
This lesson is designed for young beginners, families, and classrooms. It uses circles, ovals, curves, and straight lines, so children can focus on placement instead of tiny botanical detail. The finished flower can be a daisy, sunflower, fantasy bloom, greeting-card picture, or the first plant in a whole garden scene.
How to Draw offers kid-friendly lessons, simple references, and optional phone-guided paper practice for iPhone and iPad.
Simple Supplies for a Flower Drawing
- Plain letter-size paper or a sketchbook
- An HB or No. 2 pencil
- A soft eraser
- Crayons, colored pencils, or washable markers
- Optional: one real flower or a clear close-up photo
Large paper makes the lesson easier because the child can use the wrist and arm instead of squeezing every petal into a small space. For younger artists, thick crayons or triangular pencils may be more comfortable than narrow tools. The American Academy of Pediatrics recommends choosing age-appropriate art materials, supervising children, keeping supplies in their original labeled containers, and washing hands after cleanup.
Look at a Flower Before You Draw
Spend 20 seconds looking at a real bloom or photo. Find the center, count or estimate the petals, notice where petals overlap, and compare the width of the flower head with the length of the stem. Look for leaves growing from different heights instead of placing them like a perfectly matched pair.
A simple child’s flower is a symbol, not a scientific diagram. Real flowers can have very different structures and petal counts. A U.S. Forest Service flower-parts activity identifies petals, sepals, the pollen-making parts, and the central reproductive structures. Young artists do not need to label all of these, but looking closely helps them discover that the “middle circle” may contain dots, rings, tiny tubes, or a spiral pattern.
The National Gallery of Art’s Georgia O’Keeffe activity also asks children to look closely at one flower, notice the colors, patterns, petal shapes, and parts, then make the bloom large on the page. Try that approach after this basic lesson: zoom in until the petals touch or even extend beyond the paper edges.
How to Draw a Flower Step by Step
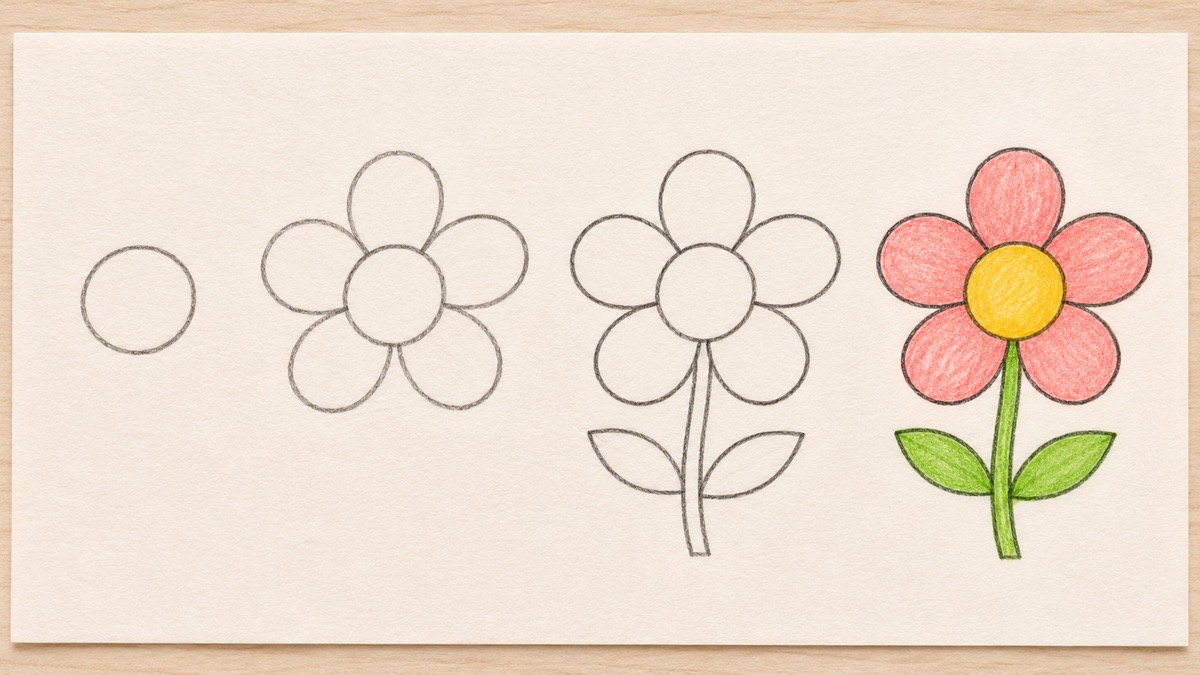
- Draw the center circle. Put a medium circle in the upper half of the page. Use two or three light pencil passes instead of pressing hard. It does not need to be perfectly round; a slightly oval center can make the flower feel hand-drawn and lively.
- Add the first petal. Draw a tall oval touching the top of the center. Make it about as long as the circle is wide. Leave the line where the petal meets the center light because that overlap may be erased later.
- Place four more petals. Add one petal on the right, two around the bottom, and one on the left. Imagine the petals pointing like the tips of a star. They may be wide, narrow, rounded, or slightly bent; they do not have to match exactly.
- Build the stem. From the bottom of the flower center, pull two nearly parallel lines down the page. Let them curve slightly in the same direction. Keep the stem wide enough to color rather than using only one thin line.
- Add two leaves. Draw a curved line out from one side of the stem and back again to make a pointed leaf. Repeat at a different height on the other side. Add one center vein inside each leaf.
- Choose the clean outline. Darken the outside edges of the petals, the visible border of the center, and both sides of the stem. Erase any stem line that passes through the flower head and remove construction marks that make the shape hard to read.
- Add pattern and texture. Put dots, small circles, or short curved marks in the center. Add a few gentle veins to the leaves. Use only a handful of texture lines so the large shapes stay clear.
- Color from light to dark. Fill petals with a light layer first, then add a darker color near the center or along one edge. Color the stem and leaves in the direction they grow. Finish with a small ground shadow, soil line, or sunny background.
Turn One Flower Into Five Easy Variations
Once the first flower works, change one feature at a time. Make a daisy with a small yellow center and long narrow white petals. Make a sunflower with a large brown center, many short pointed petals, and broad leaves. For a tulip, skip the round center and use a cup shape with three visible petal points. A poppy can have four wide, floppy petals, while a fantasy flower can use heart, teardrop, or zigzag petals.
Petal direction changes the pose. Petals that spread evenly feel calm and front-facing. Petals that become shorter on one side make the flower appear turned. A curved stem suggests wind or movement. A low leaf can overlap the stem; a high leaf can tuck partly behind the bloom. These small choices turn a copied recipe into the child’s own design.
Children can also build a garden by repeating the same simple construction at three sizes. Place the largest flower lowest on the page, smaller flowers higher, and overlap a few leaves. Add grass, a watering can, a bee, or a butterfly only after the flower shapes are clear. For more open-ended prompts, try the family drawing games guide.
Easy Coloring and Shading Ideas
Begin with one main petal color and one center color. Press lightly for the first layer so white paper can show through. Add a second layer near the flower center, where petals often overlap, and fade the pressure outward. A white highlight left on one side of the center makes the form easier to read.
For colored pencils, use small overlapping circles in the center and longer strokes along each petal. For crayons, broad side strokes fill large areas quickly. Washable markers make strong flat color, so leave a narrow white gap between neighboring shapes if dark outlines tend to blur. The coloring drawing page offers more simple subjects when children want to focus on color choices.
Real flower colors are useful references, but invented colors are equally welcome. NAEYC’s guidance on process-focused art recommends giving children choices, noticing specific decisions, and resisting the urge to “fix” their work. Instead of saying a leaf must be green, ask, “What color will help your flower stand out?”
Common Flower-Drawing Problems and Easy Fixes
The petals do not fit around the center
Place four tiny guide dots around the center at the top, right, bottom, and left. Aim the first four petals toward those dots, then add a fifth petal in the largest open space. Overlap is allowed; erase the hidden edge afterward.
The flower looks flat
Vary the petal length slightly and add a darker band where petals meet the center. Bend one petal with a second curved line or let one leaf overlap the stem. A small ground shadow keeps the flower from floating.
The stem looks disconnected
Let the two stem lines begin behind the flower head, then erase the section hidden by the center. This creates a clear overlap. If the stem is too thin, add a second line rather than coloring heavily around a single line.
The child says the drawing is “wrong”
Return to one shape at a time. Cover most of the example and show only the circle, then one petal. Demonstrate on a separate paper instead of drawing on the child’s page. The goal is a recognizable flower built by the child, not an exact copy of the sample.
Adjust the Lesson for Different Ages
- Ages 3–5: use large paper, one center, four or five big petals, and thick crayons. An adult can place a pale starting circle if the child asks.
- Ages 6–8: follow all eight steps, add a second flower, and try a simple light-to-dark color change.
- Ages 9–12: draw from a real flower, compare petal angles, add overlap, and crop the bloom for a dramatic close-up.
- Mixed ages: share one reference but give each artist a different challenge—size, color, pattern, background, or point of view.
Structured steps can reduce blank-page anxiety, but leave space for choice after the basic construction. The broader step-by-step drawing practice guide explains how to move from guided shapes to an independent redraw. Young beginners can also browse the beginner drawing hub or step-by-step drawing app page for more approachable subjects.
A 10-Minute Flower Practice Plan
- Minutes 1–2: look at one flower and name three shapes or patterns.
- Minutes 3–5: draw the center, petals, stem, and leaves with light lines.
- Minutes 6–7: choose the clean outline and erase hidden edges.
- Minutes 8–9: add color, texture, and one background detail.
- Minute 10: make a thumbnail-sized redraw from memory.
The final tiny redraw helps the child remember the recipe: center, petals, stem, leaves, details, color. On another day, repeat it with a different petal shape or a real flower nearby. The beginner practice plan shows how short repeated drawings build independence, while the tracing-to-freehand guide explains how to use extra support briefly and then remove it.
Related Drawing Guides
- How to Draw: Lessons, References, and Paper Practice
- How to Draw for Kids: Easy Ideas That Build Confidence
- Fun Drawing Games for Kids at Home
- How to Draw Step by Step: A Beginner Practice Plan
- How to Draw Step by Step Practice Guide
- Easy Doodle Drawing Ideas
References
- National Gallery of Art: Art Starters—Georgia O’Keeffe
- National Gallery of Art: Sketchbook Club—Flowers in a Vase
- U.S. Forest Service: Student Handout—Flower Parts
- NAEYC: How Process-Focused Art Experiences Support Preschoolers
- HealthyChildren.org: Choosing Safe Art & Craft Supplies for Children
Open How to Draw for friendly references and guided lessons, then redraw your favorite flower with your own petals and colors.