
Quick Answer
To learn how to draw step by step, practice one small skill at a time: observe the subject, place its largest shape, compare proportions, build simple forms, correct the silhouette, add only the most useful details, and redraw the subject without looking at the first attempt. A focused 12-minute session is enough. The goal is not to finish a masterpiece every day; it is to make one decision more accurately than you did yesterday.
Use easy subjects with clear silhouettes—a mug, pear, shoe, plant, toy, or simple animal photo. Keep the same subject for two or three attempts so your attention can move from “What am I drawing?” to “What can I improve?” Short, repeated sessions with a specific goal are more useful than filling time with unfocused doodling.
How to Draw offers guided lessons, sketch references, and optional tracing support for focused paper practice on iPhone and iPad.
Set Up a Practice Session You Will Repeat
You need only plain paper, an HB or No. 2 pencil, an eraser, a timer, and one reference. Put the reference where you can see it without constantly turning your head. If you draw from a real object, use one lamp or a nearby window so the light stays understandable. If you use a photo, choose a large, sharp image with one subject and a simple background.
Decide the skill before the timer starts. “Practice drawing” is too broad. “Keep the mug symmetrical,” “place the eyes at the right height,” or “use three shadow values” gives the session a target. The American Psychological Association distinguishes purposeful practice from rote repetition: effective practice includes attention, meaningful repetition, reflection, and useful feedback. That principle fits drawing well because you can compare each attempt with both the reference and the goal you chose.
The Seven-Step Drawing Practice Loop
- Observe before drawing. Spend 20 seconds looking. Name the widest point, tallest point, main tilt, darkest area, and two shapes you recognize. This prevents your memory of “a mug” or “a face” from replacing what is actually in front of you.
- Mark the page boundaries. Place four faint dots for the top, bottom, left, and right edges of the subject. This invisible box controls scale and keeps the drawing from drifting off the page.
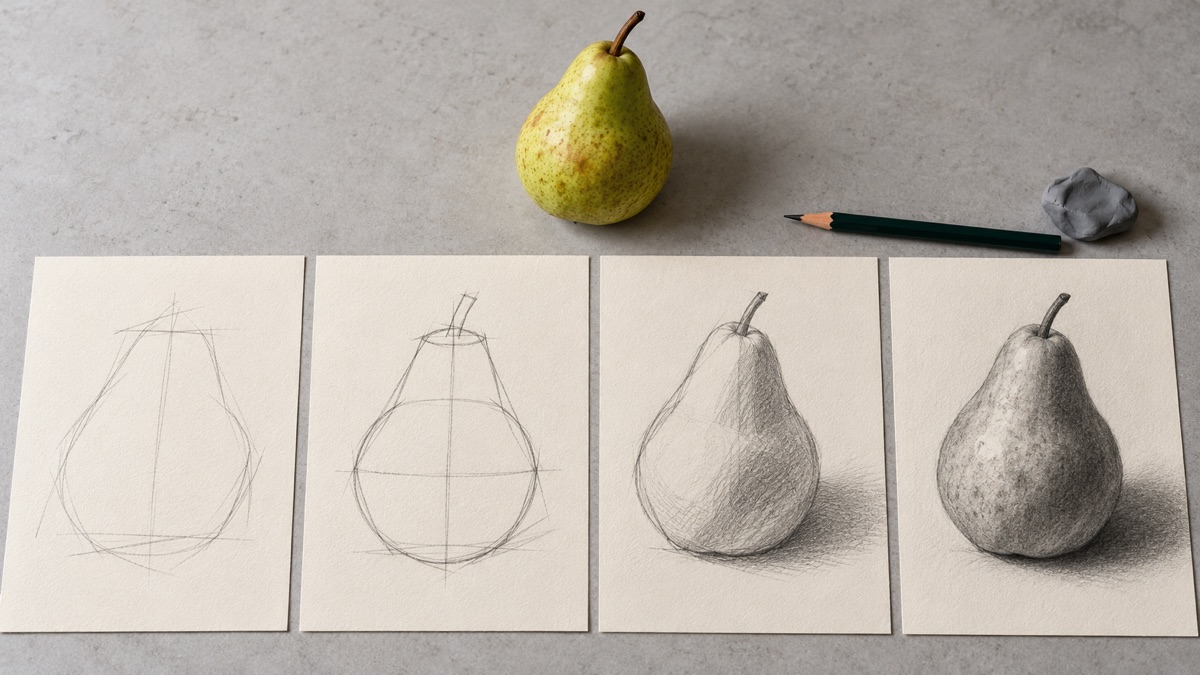
- Capture the gesture or envelope. Use one light line for the main direction, then wrap the subject in a simple outer shape. A leaning pear might fit inside a tilted teardrop; a shoe might fit inside a long wedge.
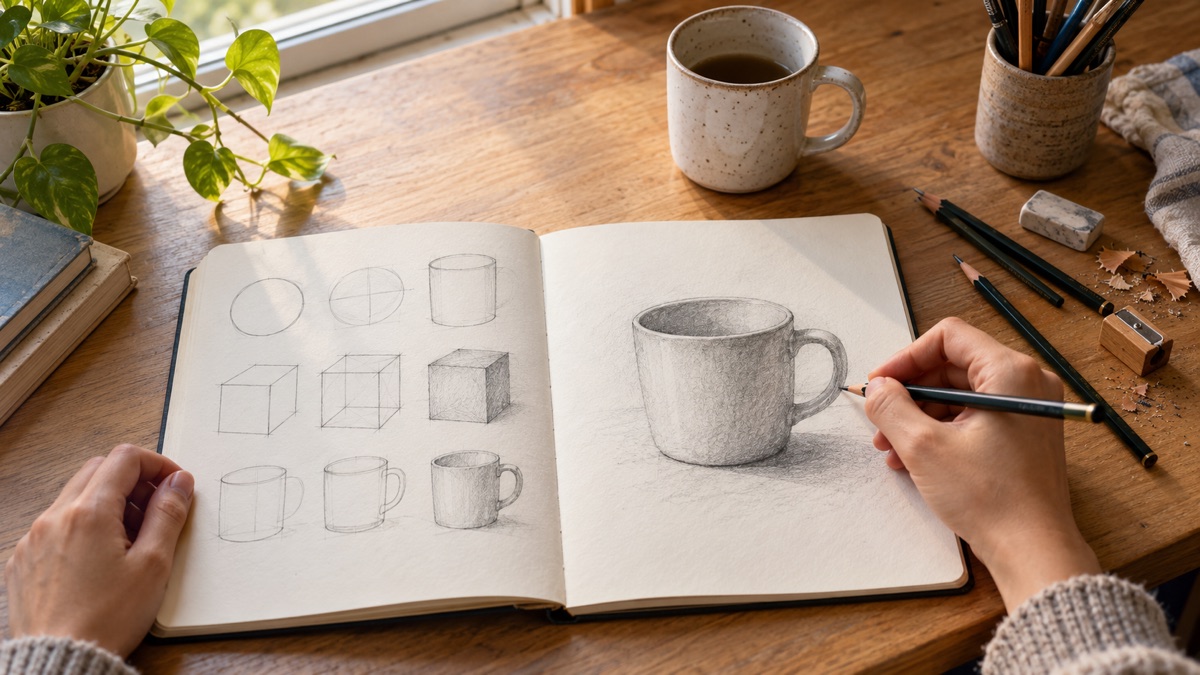
- Build simple forms. Convert the subject into circles, boxes, cylinders, and center lines. Draw through forms lightly when needed. A mug is a cylinder with an ellipse on top; a head can begin as a sphere with a jaw block.
- Compare, then correct. Check height versus width, negative spaces, and alignment. Ask one concrete question at a time: Is the handle taller than the cup opening? Does the pear lean left or right? Correct the large relationship before adding detail.
- Choose a clean contour and three values. Strengthen the useful outer edge. Then separate light, middle, and dark areas. Save texture, eyelashes, fur, or surface marks until the form reads clearly without them.
- Redraw from memory. Hide the first drawing and make a two-minute version. This is not a test of artistic worth. It reveals which shapes and relationships you understood well enough to recall—and what to study next.
A Focused 12-Minute Drawing Session
- Minutes 0–1: Observe. Identify the big silhouette, tilt, and light direction.
- Minutes 1–3: Gesture and boundaries. Place the subject on the page with faint marks and a loose envelope.
- Minutes 3–7: Construct. Build the main forms and compare two or three proportions.
- Minutes 7–9: Correct. Move one edge, angle, or feature that does not match the reference.
- Minutes 9–11: Clarify. Add a clean contour and a limited light-middle-dark pattern.
- Minute 11–12: Reflect. Write one win and one next step, such as “good tilt; make the base wider tomorrow.”
The National Gallery of Art’s drawing resources use quick scribble and gesture studies to find overall shape, then move into contour, pressure, hatching, and crosshatching. That sequence supports the same idea: solve structure first and let marks become more specific only when they serve the form.
A Seven-Day Beginner Practice Plan
| Day | Subject | Single focus | Finish with |
|---|---|---|---|
| 1 | Mug or can | Ellipses and symmetry | Two-minute redraw |
| 2 | Pear or apple | Silhouette and center line | Three values |
| 3 | Shoe | Angles and negative space | One corrected contour |
| 4 | Leaf or houseplant | Big-to-small branching | Five selected details |
| 5 | Simple animal photo | Gesture and body masses | Memory sketch |
| 6 | Your Day 2 subject | Compare with the earlier attempt | One written observation |
| 7 | Favorite subject from the week | Use the full seven-step loop | Date both attempts |
Do not increase difficulty every day. Day 6 deliberately repeats an earlier subject so you can see whether your placement, proportions, or line confidence changed. The 7-day beginner drawing guide provides another compact schedule, and the step-by-step practice guide summarizes the trace-then-redraw workflow.
Choose Subjects at the Right Difficulty
A good beginner subject has a clear outline, a small number of large forms, stable lighting, and enough personal interest to hold your attention. Start with household objects and plants before tackling shiny glass, busy street scenes, foreshortened hands, or faces with dramatic expressions. Difficulty is not a measure of seriousness. A careful drawing of a spoon can teach proportion, symmetry, reflection, and edge control.
Use the “80 percent familiar, 20 percent new” test. If you already understand cylinders, a mug with a handle adds one manageable problem. If you can draw a standing animal, a walking pose adds movement without changing every variable. The beginner drawing app page, drawing lessons hub, and step-by-step drawing page offer more guided subject paths.
Measure Progress Without Chasing Perfection
Date each page and keep it. Every seven sessions, compare drawings using three checks: placement, proportion, and clarity. Placement asks whether the subject fits the page. Proportion asks whether the large parts relate correctly. Clarity asks whether the subject reads before the smallest details are added. Score each item as “clear,” “almost,” or “next focus.” That gives you actionable feedback without pretending art has one objective grade.
Compare the same kind of task, not unrelated finished pictures. A five-minute pear from this week should be compared with another short pear study, not with someone else’s 20-hour portrait. Look for evidence: lighter construction lines, fewer unnecessary corrections, stronger value grouping, or a faster accurate block-in. Small changes are real progress.
The APA recommends timely, descriptive feedback tied to a learning goal. If a teacher, friend, or family member helps, ask a narrow question such as “Does the tilt match?” or “Which side looks wider?” Specific feedback is easier to use than “Is this good?”
Use Tracing and Apps as Scaffolding
Tracing can clarify proportion when a blank page feels overwhelming, but it should be a first pass, not the whole session. Trace only the largest landmarks or the outer envelope, turn off the guide, complete the forms and values by hand, then redraw the same subject on a fresh sheet. This gradually removes support while keeping the practice achievable.
For a stable phone-and-paper setup, follow the AR drawing app guide. If you work from personal photos, the photo-to-sketch reference workflow explains how to simplify a busy image before drawing. The key question is always the same: after the tool helps you begin, what decision will you make yourself?
Common Beginner Problems and Practical Fixes
“I do not know what to draw”
Keep a five-item subject list beside your supplies: mug, shoe, plant, fruit, and pet photo. Repeating these is useful. If you want variety without pressure, try the prompts in Fun Drawing Games for Kids at Home; several work equally well for adults.
“My drawing gets worse when I add detail”
Pause when the large silhouette reads. Squint at the reference and drawing; if the main light and dark groups do not match, detail will only decorate the wrong structure. Return to three values and strengthen one edge at a time.
“My lines look scratchy”
Ghost the motion above the page, then make one light stroke from the shoulder or elbow. The National Gallery of Art describes contour as long continuous lines and notes that repeatedly going over the same edge can create a scratchy result. Practice straight lines, C-curves, S-curves, and ellipses for one minute—not as punishment, but as a warmup.
“I erase constantly”
Use a lighter pencil pressure and delay erasing until the full construction is visible. The Metropolitan Museum of Art notes that graphite can be lifted for corrections and highlights; treat the eraser as a drawing tool, not an undo button. Move the line once you know why it should move.
“I missed a day”
Resume with the smallest possible session: one object, one goal, six minutes. Do not double the next session to compensate. A plan works because it is easy to restart.
What to Do in Your Next Session
Choose one ordinary object and write one goal at the top of the page. Observe it, mark the boundaries, build simple forms, compare the large relationships, clarify the contour, group three values, and finish with a quick redraw. Save both attempts. Tomorrow, repeat the subject or change only one variable.
Learning how to draw step by step is less about finding a perfect tutorial and more about using a repeatable loop. When each session has a visible target and a short reflection, even a modest sketch becomes useful evidence. Seven focused days will teach you more about your process than waiting for a free afternoon and the right mood.
Open How to Draw for a guided reference, practice one focused skill on paper, then redraw the subject freehand.
Related Drawing Guides
- Explore How to Draw lessons and creative tools
- Use the concise step-by-step practice guide
- Explore the How to Draw app hub
- How to Draw for Kids: Easy Ideas That Build Confidence
- How to Draw Animals for Kids: Easy Step-by-Step Practice
- How to Draw a Dog for Kids: Easy Step-by-Step Guide
References
- American Psychological Association: Practice for Knowledge Acquisition
- National Gallery of Art: Drawing Everyday Objects
- National Gallery of Art: Explore the Basics of Drawing
- National Gallery of Art: Mindful Drawing Activities That Embrace Experimentation
- The Metropolitan Museum of Art: Graphite Drawing Materials and Techniques