Quick Answer
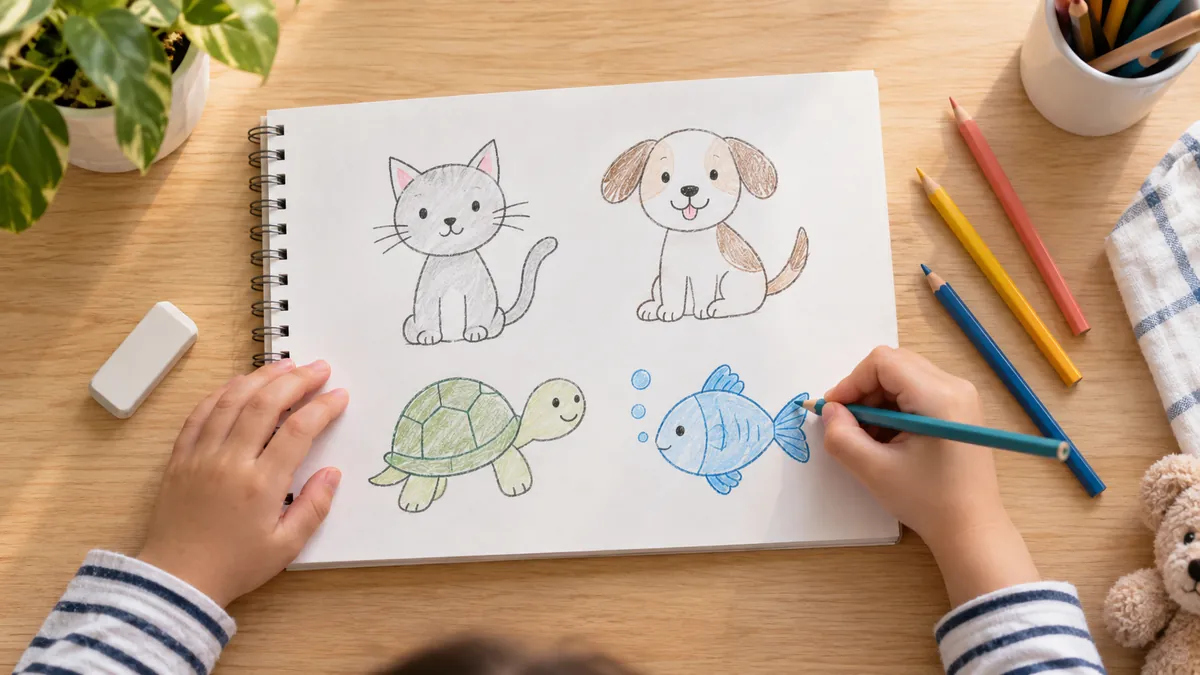
To draw animals for kids, begin with two or three large shapes instead of an outline. Use a circle for the head, an oval for the body, and simple lines for the spine and legs. Check where the animal faces, connect the shapes, add only the features that make it recognizable, and erase extra construction lines. A cat can start as two circles and triangles; a turtle can start as one wide oval. The goal is not perfect anatomy. It is a clear, friendly animal that a young artist can finish and enjoy.
Open How to Draw for guided lessons, animal references, and step-by-step paper practice on iPhone or iPad.
Simple Supplies for Animal Drawing
Keep the first session easy to set up. You need plain paper, a pencil that makes a light line, an eraser, and optional crayons or colored pencils. An HB pencil is a practical all-purpose choice. If a child presses hard, try a harder pencil or remind them that the first shapes are temporary. Large paper gives a young artist more room to move the whole hand and makes small details less important.
A reference can be a clear photo, a picture book, a stuffed animal, a pet sitting nearby, or a guided lesson. Choose one animal in a simple pose. A side view or a sitting pose is usually easier than an animal running toward the viewer. The Getty’s elementary lesson on finding animals in art asks children to notice shape, color, line, and texture—four useful questions for any animal drawing.
The Easy Shape Method
- Find the biggest mass. Ask, “Is the body more like an oval, a bean, or a rounded box?” Draw it lightly in the center of the page.
- Add the head. Place a circle or oval beside or above the body. Leave enough room for ears, a beak, horns, or a mane.
- Show direction. Draw one faint action line through the body. Even a sitting animal leans or curves in a direction.
- Place the limbs. Use single lines before drawing thick legs. Mark joints with small circles when the pose is bent.
- Connect the forms. Turn the separate shapes into one silhouette with a neck, belly, back, and outer leg lines.
- Add identifying features. Ears, tail, nose, eyes, paws, fins, shell patterns, spots, or stripes make the species readable.
- Clean and finish. Erase the shapes that are no longer needed, darken the best lines, and add color or texture.
The National Gallery of Art’s shape resource distinguishes regular geometric shapes from the rounded, irregular shapes found in nature. Kids do not need those vocabulary terms to use the idea: a circle can become a head, then a slightly uneven curve can make the animal feel alive.

Five Easy Animals to Draw Step by Step
1. Easy cat
- Draw a medium circle for the head and a larger oval below it for the body.
- Add two triangles for ears and a long curved line for the tail.
- Place two front legs as narrow rounded rectangles; show the back paws with small ovals.
- Add dot eyes, a small upside-down triangle nose, a short mouth, and three whiskers on each side.
- Darken the outline and add stripes, spots, or a collar chosen by the child.
2. Easy dog
- Start with a circle for the head and a pear-shaped body underneath.
- Draw floppy oval ears or upright triangle ears. Either choice can become a different dog.
- Add two front legs, two side bumps for the back legs, and a curved tail.
- Place the eyes halfway down the head. Add a rounded muzzle, nose, and smiling mouth.
- Finish with patches, short fur marks, or a bright bandanna.
3. Easy fish
- Draw a wide oval and attach a triangle tail.
- Add a curved line near the front for the head and a small circle for the eye.
- Place one fin on the side and simple fins along the top and bottom.
- Use overlapping half-circles for a few scales; the page does not need hundreds of them.
- Add bubbles, seaweed, and two or three colors that repeat across the body.
4. Easy turtle
- Draw a wide oval for the shell and a smaller oval for the head.
- Add four soft paddle shapes or short legs beneath the shell.
- Connect the head with two neck lines and add a tiny tail at the other end.
- Divide the shell with a few large curved sections instead of a tight grid.
- Add a friendly eye, a small smile, and darker color near the shell’s lower edge.
5. Easy owl
- Draw a tall oval, then flatten the bottom slightly so the owl can sit.
- Add two large circles for the eyes and a small diamond or triangle for the beak.
- Draw curved wings along both sides and two short feet below the body.
- Use rows of U-shaped marks for chest feathers and pointed curves above the eyes.
- Color the eyes brightly and repeat two or three feather colors rather than filling every section differently.
A 10-Minute Animal Drawing Routine
Short, repeatable practice is easier to sustain than one long lesson. Spend the first minute choosing one subject and noticing its largest shapes. Use three minutes for the head, body, action line, and limb placement. Use three more minutes to connect the outline and add the face. Save the final three minutes for texture, color, and one imaginative detail.
When the timer ends, write the date on the back and keep the drawing. The next session can repeat the same animal in a new pose. Repetition is useful because the child already knows the basic recipe and can pay attention to a new skill: longer legs, a turned head, smoother curves, or a different expression. The broader 7-day beginner practice plan offers a simple schedule, while the step-by-step practice guide explains how to move from large forms to a freehand redraw.
How Grown-Ups Can Help Without Taking Over
Show the process on your own sheet instead of correcting the child’s paper. Ask observation questions such as “Which shape is biggest?” “Where does the tail begin?” or “What kind of line would make the fur look soft?” If a part feels difficult, offer two workable choices: simplify the paw into an oval, or hide part of it behind the body.
Comment on decisions and effort rather than judging whether the picture is “good.” Try, “I noticed you made the shell from three big curves,” or “You kept adjusting the ears until they matched your idea.” NAEYC’s guidance on process-focused art experiences recommends noticing what children make, allowing choice, and treating art as exploration. A step-by-step lesson can provide a helpful starting structure, but the child should still own the colors, expression, setting, and story.
Common Problems and Quick Fixes
The animal does not fit on the page
Before drawing the full outline, mark the animal’s top, bottom, left, and right edges with four light dots. Fit the head and body inside that invisible box. If the subject still grows too large, turn the paper sideways or begin again on a new sheet without treating the first attempt as a failure.
The legs look uneven
Draw each leg as one line first, then add thickness around it. Check where the feet meet the ground by drawing a faint horizontal floor line. Animals in side view may have overlapping legs; hiding part of a far leg is often clearer than forcing all four legs into view.
The child gets stuck on fur or feathers
Texture does not have to cover the whole animal. Place short fur marks near the cheeks, chest, joints, and tail. Add a few feather rows to an owl’s chest and leave other areas quiet. The National Gallery’s drawing basics demonstrate how line pressure, contour, hatching, and quick gesture marks create different effects.
The drawing looks different from the example
That difference is useful. Ask the child to name what makes their animal special, then add a setting or a short story. The animal might be sleepy, excited, underwater, on the moon, or wearing rain boots. A recognizable subject plus a personal choice is a stronger outcome than an exact copy.
Use References and Tracing as a Bridge
A guided reference can remove blank-page anxiety. In How to Draw, children can explore animal ideas, follow lessons, or use a phone-guided setup with an adult. If proportions are frustrating, trace only the head and body shapes. Then hide the guide and add the face, texture, and setting independently.
For the next attempt, keep the finished drawing nearby but start from a blank page. On a third attempt, look at a photo of the real animal and decide which shapes to use. This supported-to-independent sequence makes the reference a learning tool. Families can explore more examples on the easy animal drawing page and more beginner support on the drawing app for beginners page.
Related Drawing Guides
- How to Draw a Dog for Kids: Easy Step-by-Step Guide
- Fun Drawing Games for Kids at Home
- How to Draw for Kids: Easy Ideas That Build Confidence
- AR Drawing App: Trace Pictures on Paper With Your Phone
- How to Draw Step by Step Practice Guide
- 7-Day Learn to Draw Practice Plan
- Easy Animal Drawing Ideas
- Step-by-Step Drawing App
References
- J. Paul Getty Museum: Finding the Animals—A Visual Exploration of Art
- National Gallery of Art: The Elements of Art—Shape
- National Gallery of Art: Explore the Basics of Drawing
- NAEYC: How Process-Focused Art Experiences Support Preschoolers
- J. Paul Getty Museum: Capturing the Moment in 3-D
Download How to Draw, choose a kid-friendly reference, and turn circles and ovals into an animal with its own personality.