
Quick Answer
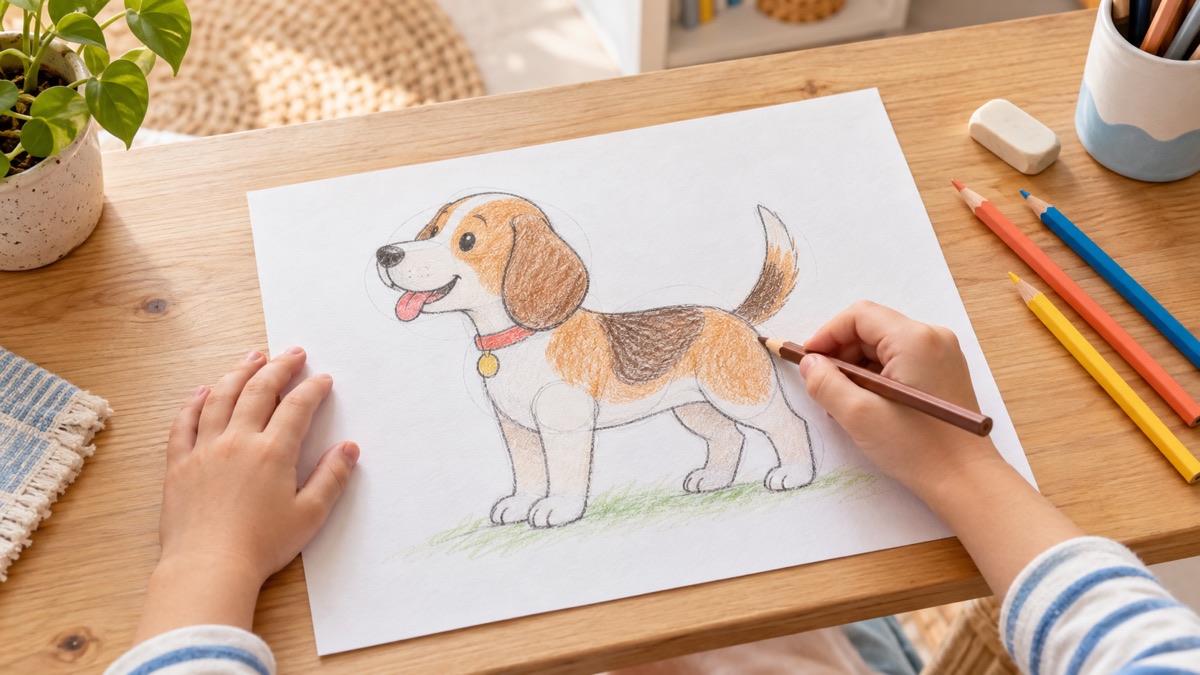
To draw an easy dog, start with one circle for the head, an oval for the muzzle, and a long bean shape for the body. Add four short legs, floppy or pointed ears, a curved tail, and a simple face. Connect the shapes with smooth lines, erase the extra construction marks, then color the coat. Kids do not need perfect anatomy to make the drawing read as a dog; a clear muzzle, ears, paws, and tail do most of the work.
This lesson uses a friendly side view because the head, back, belly, and four legs are easy to see. Work lightly at first. The early circles are planning tools, not mistakes. A child who can draw a circle, oval, curve, and short line already has every mark needed for the lesson.
How to Draw offers step-by-step lessons, animal ideas, and optional phone-guided practice for iPhone and iPad.
Simple Supplies
- Plain letter-size or sketch paper
- An HB or No. 2 pencil
- A soft eraser
- Crayons, markers, or colored pencils
- Optional: a clear side-view dog photo for observation
Large paper is forgiving because there is room to move the whole arm. If a young artist presses hard, begin with a crayon or a light-colored pencil for the construction shapes and use a darker tool for the final outline. Skip tiny details until the entire dog fits comfortably on the page.
See the Dog as Five Big Shapes
Before drawing, look at a real dog or a clear photo for ten seconds. Find the head, muzzle, rib-cage body, hip area, and the line of the back. Ignore the fur. Ask: Is the head round or narrow? Is the body long or compact? Do the ears stand up or hang down? Is the tail straight, curled, or fluffy?
Artists often simplify complicated subjects before adding detail. The National Gallery of Art’s drawing lessons emphasize overall shape, contour, line pressure, and repeated observation. For this dog, the circle and oval are only a framework. They make it easier to move the head or lengthen the body before the outline becomes dark.
How to Draw a Dog Step by Step
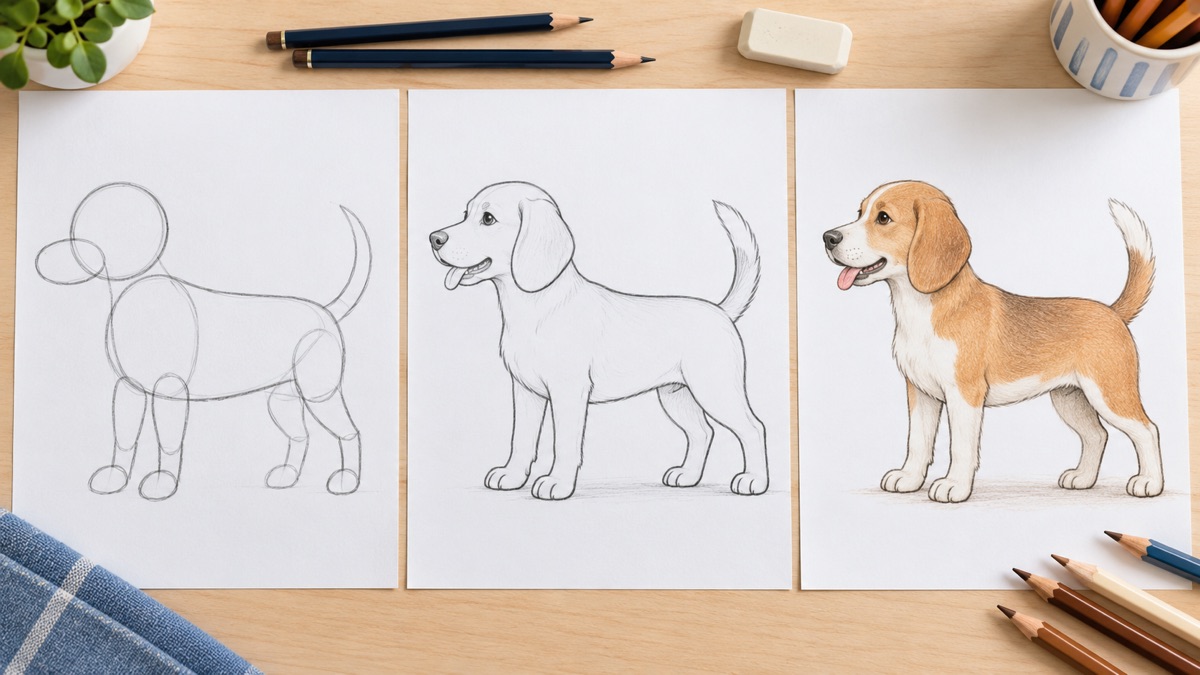
- Draw the head circle. Place a medium circle a little left of the page center. It does not need to be perfectly round. Use two or three light passes instead of pressing one heavy line.
- Add the muzzle. Attach a small sideways oval to the lower-left side of the head. The far end of this oval will become the nose. A short muzzle makes the dog look puppy-like; a longer oval suggests a hound or retriever.
- Build the body. Draw a long, gently rounded bean shape behind and slightly below the head. Leave a small overlap where the neck will connect. Add a smaller oval near the back for the hip if it helps you place the rear legs.
- Place the legs and paws. Add four simple leg guides beneath the body. Begin each leg as a short line or narrow rounded rectangle. Finish with a small horizontal oval for the paw. Put all paws on the same faint ground line.
- Choose ears and a tail. For a floppy-eared dog, draw a long leaf shape from the side of the head. For pointed ears, use soft triangles on top. Add a curved tail from the rear of the body. Keep the base of the tail thicker than the tip.
- Connect the outline. Use smooth curves to join the forehead to the muzzle, the head to the chest, and the back to the hip. Round the belly into the legs. Where one shape overlaps another, choose the cleanest outer edge instead of tracing every construction line.
- Add the face and paws. Place one visible eye above the muzzle, a rounded triangle nose at the front, and a small curved mouth. Add two or three short toe marks to each paw. Keep the eye simple: a dark oval with a tiny highlight is enough.
- Erase, color, and finish. Let the final outline dry if you used marker, then erase the pale circles. Add a collar, patches, short fur marks, or a favorite color. Finish with a ground shadow so the dog looks as though it is standing rather than floating.
Make the Drawing Look Like Your Dog
The same construction can become many kinds of dogs. Change only two or three features at a time so the drawing stays manageable. For a beagle-like dog, lengthen the ears, use a sturdy body, and add two or three coat patches. For a terrier, shorten the muzzle, point the ears, and use broken zigzag marks around the cheeks. For a retriever, lengthen the legs and tail and add soft feathered lines near the chest. For a cartoon puppy, enlarge the head and eyes while shortening the legs.
If drawing a family pet, compare the silhouette before worrying about color. Notice where the chest is deepest, where the back changes angle, and whether the tail rises above or stays below the back. Veterinary body-condition guides also illustrate two useful observation landmarks: the rib-cage area and the upward tummy tuck behind it. The goal here is not a medical assessment—it is simply to notice that a dog’s body is rarely a flat rectangle.
Coat texture works best in selected places. Use short marks around a smooth-coated dog’s chest and joints. Use longer tapered strokes along a fluffy tail or ear. Follow the direction the fur grows instead of filling every space with equal scribbles. Leaving quiet areas makes the textured areas easier to see.
Give the Dog a Friendly Expression
Ears, tail, mouth, and posture change the feeling of the picture. A loose body, gently open mouth, neutral ears, and sweeping tail can make a drawn dog feel playful. A low body with pinned ears and a tucked tail reads differently. The American Kennel Club notes that real dog body language should be read as a complete set of signals rather than from one feature alone, so treat expression as a whole-body design choice.
Try a play bow by lowering the chest and keeping the back end high. Draw a sleepy dog by closing the eye, lowering the head onto the front paws, and relaxing the tail. Draw an alert dog by lifting the head, pointing the ears forward, and shifting the chest slightly ahead of the legs. These pose changes tell a story without needing a complicated background.
Common Problems and Easy Fixes
The legs look uneven
Return to the ground line. Shorten any paw that drops below it and extend a leg that stops above it. Remember that the far legs can sit slightly behind the near legs; they do not need to show in full. Draw the leg as one center line first, then add thickness around it.
The face looks more like a bear
Make the muzzle project farther from the head and move the nose to its tip. Give the dog a visible neck instead of attaching the round head directly to a round body. Floppy ears, a collar, and clear paws also strengthen the dog shape.
The body is too long or too short
Compare the head length with the body length before darkening the outline. There is no single correct ratio because dog breeds vary widely. If the drawing is meant to match a reference, hold the pencil at arm’s length and use the head as a simple measuring unit. If it is a cartoon, keep the choice and repeat it consistently.
The drawing feels stiff
Add a gentle action line before the outline: a curve from nose to tail that suggests the dog leaning, stretching, or trotting. Then angle the shoulders, hips, and paws around that curve. A one-minute gesture drawing can feel more alive than a carefully traced contour because it captures direction first.
How Grown-Ups Can Help
Demonstrate on a separate sheet instead of redrawing the child’s lines. Ask small observation questions: “Which oval is biggest?” “Where does the ear begin?” “What could make the tail look fluffy?” Praise decisions and persistence, not closeness to the sample. “You used a long curve for the back” gives the child more useful information than “That looks perfect.”
Step-by-step structure can reduce blank-page worry, but leave choices open. NAEYC’s guidance on children’s creativity recommends varied drawing materials, room for exploration, and adult support that does not turn every project into one predetermined result. After the basic dog is finished, invite the child to invent a name, collar, setting, job, or favorite toy. That final choice turns a lesson into their picture.
A 10-Minute Dog Drawing Practice Plan
- Minute 1: look at a dog photo and name three big shapes.
- Minutes 2–4: draw the head, muzzle, body, legs, ears, and tail lightly.
- Minutes 5–6: connect the outer contour and add the face.
- Minutes 7–8: erase extra lines and add two coat details.
- Minutes 9–10: make a tiny second dog from memory beside the first one.
The small redraw matters. It asks the child to remember the recipe—head, muzzle, body, legs, ears, tail—without copying every edge. On another day, repeat the lesson with standing ears, a longer body, or a sitting pose. The broader step-by-step practice guide shows how to move from guided construction to independent drawing, while the animal drawing hub offers more subjects to try.
If proportions are frustrating, an adult can use a guided reference or help set up an assisted first pass. Keep the support brief: trace or place only the largest shapes, hide the guide, and finish the face, fur, and setting freehand. The AR drawing app guide explains this trace-then-redraw approach in more detail.
Draw One Dog, Then Invent Another
An easy dog drawing succeeds when the child can recognize the shapes, finish the picture, and make at least one personal choice. Start lightly, solve the whole silhouette before details, and use the ears, muzzle, paws, and tail to make the subject clear. If the first attempt looks unusual, give it a name and draw a second version. Familiarity grows quickly when the same simple recipe is repeated in a new pose.
For the next challenge, draw the dog looking back, sleeping on a rug, catching a ball, or standing beside a much smaller puppy. Those changes build observation and storytelling without requiring an entirely new set of skills.
Open How to Draw for animal lessons and guided references, then make a quick freehand dog from memory.
Related Drawing Guides
- Explore How to Draw lessons and drawing tools
- Find more easy animal drawing ideas
- Explore the drawing app for beginners page
- How to Draw Animals for Kids: Easy Step-by-Step Practice
- How to Draw for Kids: Easy Ideas That Build Confidence
- Fun Drawing Games for Kids at Home