Quick Answer
The best drawing app for iPad is the one that matches what you want to practice. A beginner usually benefits more from clear step-by-step lessons, simple references, and a repeatable practice plan than from hundreds of professional brushes. A digital illustrator may care most about layers, pressure-sensitive tools, canvas size, and export formats. Someone who wants to improve on real paper needs references that stay readable, easy zoom and positioning, and a workflow that ends with a pencil in hand.
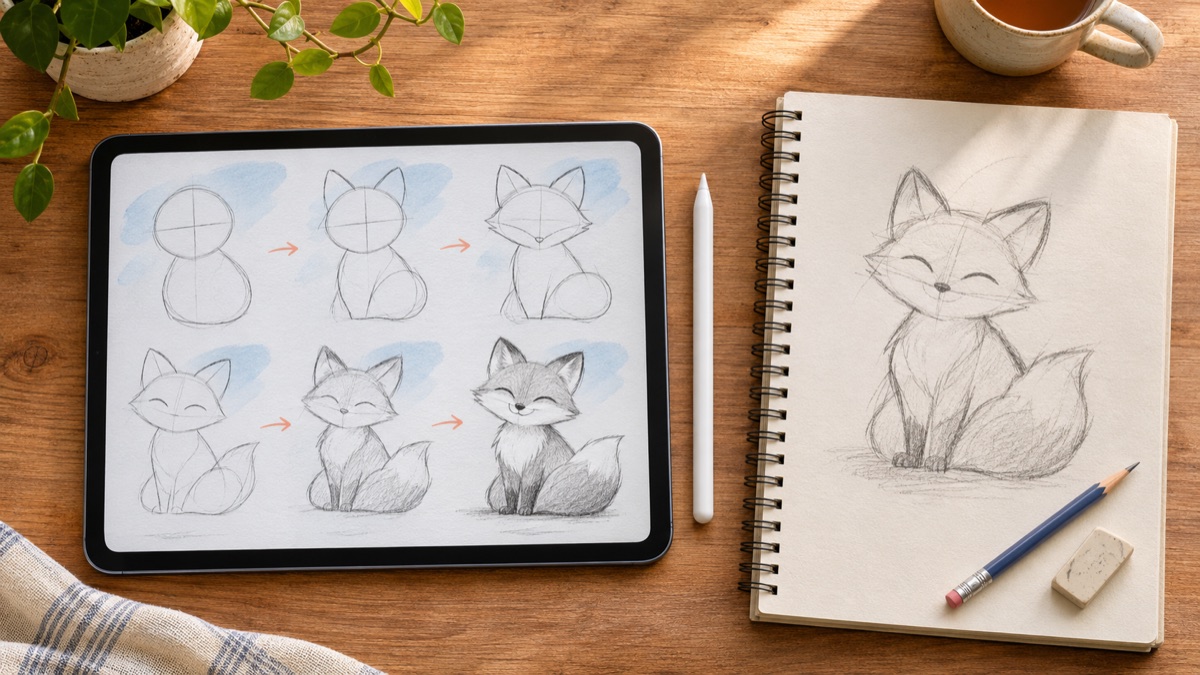
For lesson-led drawing and paper practice, How to Draw is designed around guided sketches, photo-to-sketch tools, a lightbox/projector workflow, and subjects you can practice on screen or transfer to paper. Whatever app you choose, test it with one complete session before judging it: follow a lesson, make a sketch, hide the guide, and redraw the subject from memory.
Open How to Draw for step-by-step references, sketch tools, and a practical route from screen lessons to paper practice.
What “Best Drawing App” Should Mean
“Best” is not a universal feature list. It is a fit between the app, the learner, and the next drawing task. A complex studio app can be excellent and still be a poor first teacher. A lesson app can be motivating and still feel limiting to an artist who needs multi-layer painting and print production. Start with the result you want after 30 days, not the longest App Store description.
- Learn fundamentals. Look for ordered lessons that explain large shapes, proportion, line direction, and a clean finishing pass.
- Build a sketch habit. Favor quick access, manageable prompts, progress you can save, and lessons short enough to repeat.
- Draw digitally. Check brush response, erasing, undo, layers, selection tools, color control, and export quality.
- Improve on paper. Choose references with clear silhouettes, adjustable scale, uncluttered steps, and a natural handoff to a sketchbook.
The drawing app for beginners guide offers a broader starting checklist. The rest of this article focuses on the iPad as both a learning screen and a drawing surface.
Seven Features Worth Checking
1. Lessons that reveal the construction
A useful lesson shows more than a polished final outline. It lets you see the first circle, axis, gesture, bounding box, or centerline. Those early decisions explain why later details sit where they do. Look for a clear progression, the ability to pause, and references that remain legible when the iPad is propped beside your paper.
2. A low-friction sketch space
The first mark should not require a long setup. A beginner-friendly canvas needs an obvious pencil, eraser, undo control, and sensible default brush. Extra tools are welcome when they stay out of the way. If you spend five minutes choosing brushes for a ten-minute study, the interface is controlling the session.
3. Apple Pencil support that fits your device
Apple Pencil gives more control than a finger, and supported tools can respond to tilt or pressure depending on the Pencil model and app. Compatibility is model-specific, so check Apple’s current compatibility list before buying a Pencil. A third-party stylus may be enough for tapping through lessons, but active Pencil input matters more when you plan to sketch directly on the screen.
4. References you can resize and simplify
A good reference tool lets you crop distractions, enlarge the subject, and compare a simplified sketch with the original image. Photo conversion is most helpful when it reduces visual noise rather than turning every texture into a dark edge. The photo-to-sketch drawing guide explains how to preserve the big shapes while leaving room for observation.
5. Export and saving that match your goal
If the iPad drawing is the final artwork, check image resolution, file formats, transparent-background support, and whether the app preserves editable work. If the screen is only a lesson or reference, a saved snapshot and an organized favorites list may be enough. Do not pay for a production feature set you will never use.
6. Clear pricing and privacy information
Review the App Store’s in-app purchase and privacy sections before starting a project. Confirm what is available without a subscription, what a trial becomes after it ends, and whether importing photos is central to your intended workflow. For a child’s device, an adult should review purchase controls, photo access, sharing options, and the age rating.
7. A reason to practice without the app
The strongest learning app eventually makes itself less necessary. It should encourage observation, recall, variation, and independent choices—not only perfect copying. A prompt to redraw the subject at a new size or in a different pose is more valuable than another decorative filter.
Set Up the iPad for Comfortable Drawing
Place the iPad where you can see it without twisting your neck. For paper practice, a stable stand at a shallow angle works well; position the sketchbook directly in front of your drawing hand. Reduce screen glare, use even room lighting, and enlarge the lesson until the main shapes are easy to compare. Keep the charging cable away from the drawing area.
For on-screen sketching, sit so the forearm is supported and the wrist can move freely. Rotate the canvas instead of forcing a difficult stroke direction. Apple notes that Apple Pencil can be used for drawing, sketching, and markup, with model-dependent controls such as tilt, pressure, double-tap, hover, or squeeze. You do not need every advanced gesture to learn; begin with one pencil, one eraser, and undo.
A Four-Part iPad-to-Paper Practice Workflow
- Watch and name the structure. Before drawing, identify the subject’s three largest shapes, its tilt, and two landmarks. Pause the lesson before the final details appear.
- Make one guided sketch. Draw on the iPad or on paper while the reference is visible. Keep construction lines light and limit the first pass to the large forms.
- Copy without tracing. Move to a blank area and rebuild the subject while looking back and forth. Compare angles and distances instead of following every edge.
- Hide the guide and vary it. Redraw from memory, then change the pose, scale, expression, or viewpoint. This final variation tests whether the lesson became usable knowledge.
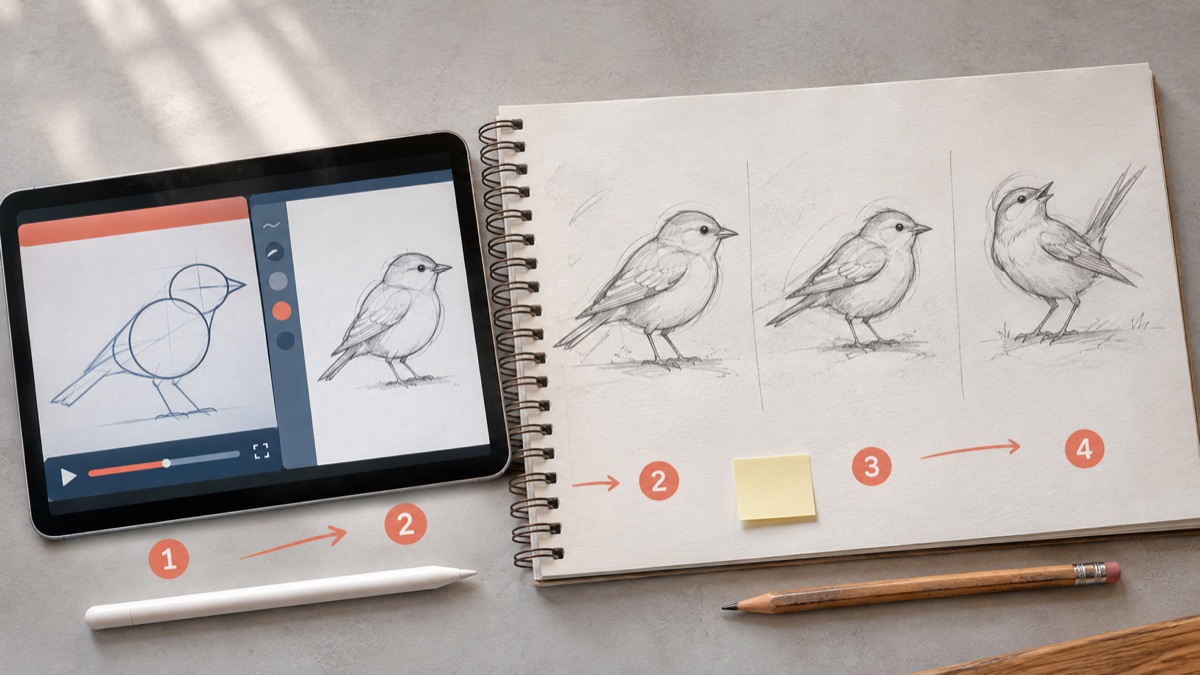
This workflow uses the iPad for clarity and feedback without letting the guide make every decision. It also matches a useful finding from drawing-and-memory research: drawing can involve visual, motor, and elaborative thought in ways that support later recall. That research does not prove that any particular app teaches drawing, but it supports active production over passive watching.
Where How to Draw Fits
How to Draw, Step by Step is a strong option when your priority is guided practice rather than a blank professional canvas. Its current App Store listing describes step-by-step sketches, photo-to-sketch conversion, AI-generated sketch references, coloring, lightbox and projector tools, recording, saving, and sharing. The app is designed for iPad and also works on iPhone, so a lesson can stay on the larger screen while you work in a sketchbook.
The app is especially relevant for beginners who want a subject selected for them, families who prefer structured drawing time, and learners who like moving between screen guidance and physical paper. The projector and lightbox tools can help place a large outline or difficult proportion, but use them as temporary support. The trace–copy–recall guide explains how to reduce assistance instead of tracing every version.
If you need advanced painting, deep layer management, print color workflows, custom brush engines, or desktop round-tripping, compare dedicated studio apps as well. If your goal is to choose a reference, understand its construction, make a sketch, and continue on paper, lesson-led features may matter more than production complexity.
When to Draw on Screen and When to Use Paper
Draw on the iPad when you want rapid undo, easy resizing, color experiments, a portable set of tools, or a clean way to test composition. Digital drawing removes some material friction, which can make short daily practice easier. It is also useful for enlarging a reference and isolating problem areas.
Use paper when you want direct surface feedback, a fixed page boundary, fewer interface decisions, or a physical record of your progress. A paper sketch also prevents endless zooming into details. Neither medium is automatically more “real.” They emphasize different decisions, and alternating between them exposes different habits.
A simple rule works well: use the iPad to understand and experiment; use paper to retrieve and commit. You can reverse that order too—make a loose paper thumbnail first, refine digitally, then create a final traditional version. The important part is that each transition has a purpose.
Common App-Practice Mistakes
Collecting tools instead of drawings
Brush packs, reference folders, and app comparisons can feel productive while keeping the page blank. Choose one pencil and finish five small studies before changing the setup.
Zooming too far, too early
If the eye or leaf fills the whole screen, it becomes easy to polish a detail that is misplaced in the larger drawing. Work zoomed out until the silhouette and proportions read clearly.
Tracing the final outline only
A final contour hides the construction choices underneath. Trace or copy the centerline, major masses, and a few landmarks first. Then hide the guide and connect them yourself. For setup details, see the AR drawing app guide or the working AR drawing practice page.
Judging the app after one difficult subject
A portrait, hand, or foreshortened animal can overwhelm a new workflow. Test the app with a simple object, a cartoon animal, and one subject you genuinely care about. Then evaluate whether the lessons are clear and whether you want to return tomorrow.
A 20-Minute Test Before You Commit
- Minutes 1–3: find a beginner lesson and identify its first three construction decisions.
- Minutes 4–9: complete a small guided sketch using only pencil, eraser, and undo.
- Minutes 10–14: make a second version on paper while looking at the reference.
- Minutes 15–18: hide the lesson and redraw the subject at half size.
- Minutes 19–20: note one useful app feature, one friction point, and one skill to practice next.
If the app helped you begin quickly, understand the structure, and complete an independent attempt, it passed the most important test. Repeat the same subject a week later. For a longer routine, use the beginner drawing practice plan or the seven-day learning guide.
Choose the App That Leads to the Next Drawing
The best drawing app for iPad should shorten the distance between “I want to draw” and a finished practice page. For a beginner, that usually means understandable lessons, responsive basic tools, useful references, compatible stylus support, and a clear path from guidance to independent work.
Use the iPad for what it does best: organized lessons, flexible references, quick experiments, and immediate corrections. Then close or cover the guide and draw again. The second version—less perfect and more independent—is where much of the learning becomes visible.
Try How to Draw, then make a guided study and a freehand paper version before the session ends.
Related Drawing Guides
- How to Draw: Guided Lessons, Sketches, and Paper Practice
- Trace Drawing App: When Tracing Helps You Learn
- Photo to Sketch App: Turn a Photo Into a Drawing Reference
- How to Draw Step by Step: A Beginner Practice Plan
- Drawing Projector App vs Lightbox
- Drawing App for Beginners Guide
- AR Drawing Practice and Phone-Guided References