
Quick Answer
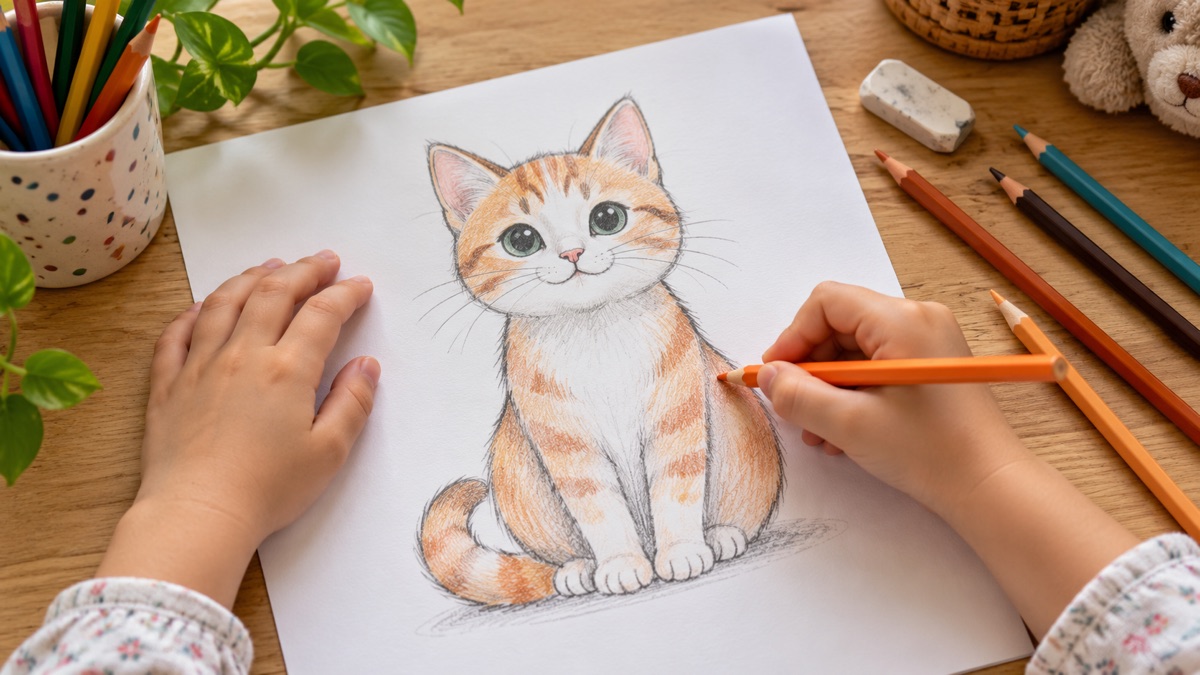
To draw an easy cat, begin with a circle for the head and a tall oval for the body. Add two triangle ears, two long front legs, two rounded back paws, and one sweeping tail. Place the eyes around the middle of the head, then add a small upside-down triangle nose, a short curved mouth, and whiskers. Clean the outside contour, erase the construction shapes, and finish with stripes, spots, or colors.
This lesson uses a front-facing sitting cat because both sides are easy to compare. Young artists only need a circle, oval, triangle, curve, and short line. The first shapes should be light and loose. They are a plan that can be moved or corrected, not a test of whether the drawing is already perfect.
How to Draw offers step-by-step lessons, animal ideas, and optional phone-guided paper practice for iPhone and iPad.
Simple Supplies
- Plain letter-size paper or a sketchbook
- An HB or No. 2 pencil
- A soft eraser
- Colored pencils, crayons, or washable markers
- Optional: a clear, well-lit cat photo for observation
Large paper gives children room to use the whole arm instead of squeezing every detail into a tiny space. If the child presses hard, use a light-colored pencil for the construction shapes and a darker pencil or marker for the final line. Save color until the full cat fits on the page.
See the Cat as Six Big Shapes
Before drawing, look at a cat or a clear photo for ten seconds. Find the head circle, chest oval, two haunch shapes, front-leg columns, and tail curve. Ignore individual hairs. Ask whether the body is tall or curled, where the paws touch the floor, and whether the tail sits beside, behind, or in front of the body.
The National Gallery of Art’s mindful drawing activities connect looking with pencil movement and encourage experimentation. That is useful here: the circle and oval are not outlines that must survive. They help the artist compare size, placement, and direction before choosing the final contour.
How to Draw a Cat Step by Step
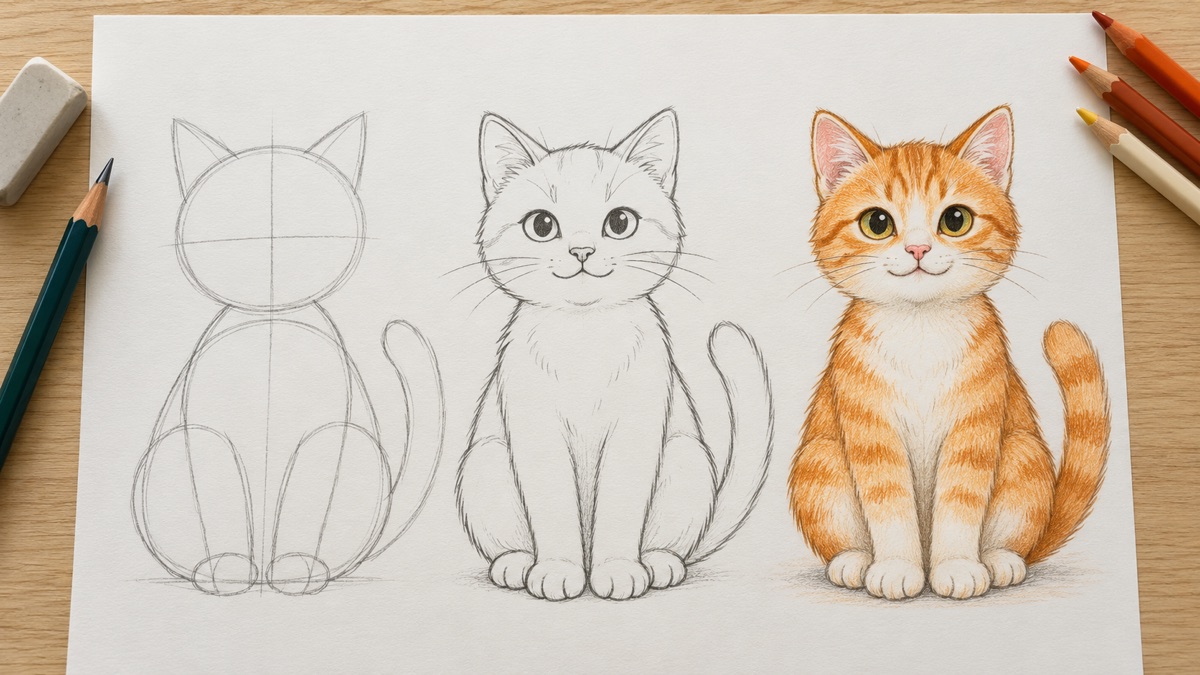
- Draw the head circle. Place a medium circle in the upper half of the page. Use two or three light passes. Add a faint vertical centerline and a horizontal eye guide so the face will stay balanced.
- Add two triangle ears. Put a soft triangle on each side of the top of the head. The inner ear can be a smaller triangle. Rounded corners make the cat look gentle; taller triangles create a more alert silhouette.
- Build the chest and haunches. Draw a tall oval under the head for the chest. Add a large curved bump on each lower side for the folded back legs. Let the shapes overlap because extra lines will be erased later.
- Place the front legs and paws. Draw two long, slightly tapered columns down the front of the body. Finish each with a small rounded paw on the same ground line. Add two wider back paws beside them.
- Sweep in the tail. Start the tail near one haunch and draw a long S-curve around the side. Add a second parallel curve and close the rounded tip. Keep the base thicker than the end.
- Connect the clean outline. Join the cheek to the chest, round the shoulders into the front legs, and choose the smooth outside edges of the haunches. Do not darken every overlapping shape; keep only the lines a viewer would see.
- Add the face. Put two eyes on the horizontal guide with about one eye-width between them. Add a small upside-down triangle nose, two short mouth curves, and three whiskers on each cheek. A tiny highlight keeps dark pupils readable.
- Erase, pattern, and color. Remove the pale guides after the final outline is clear. Add a white chest, tabby stripes, calico patches, or an invented pattern. Color lightly in the direction the fur grows and finish with a soft ground shadow.
Change the Pattern, Fur, and Face
The same sitting-cat construction can become many characters. For a tabby, add narrow stripes on the forehead, cheeks, legs, and tail rather than covering every inch. For a tuxedo cat, keep the chest, muzzle, and paws white while making the back and head dark. For a calico, use a few large irregular patches. For a fluffy cat, widen the cheeks and tail, then break selected contour lines into short tapered tufts.
Change only two or three features at a time. A kitten can have a slightly larger head, bigger eyes, and shorter legs. An older cartoon cat might have smaller eyes, a longer muzzle, and a relaxed curved back. A real cat’s color pattern is less important than its silhouette, so compare head shape, ear size, body length, and tail before adding markings.
Fur texture should follow the form. Short strokes can wrap around the cheeks, chest, and haunches. Longer strokes work on a fluffy tail. Leave smooth areas between textured ones; if every section receives the same scribble, the body shapes become harder to read.
Use Ears, Eyes, Tail, and Posture
A cat’s pose can tell a story before the background is drawn. Cats Protection advises reading the whole combination of posture, ears, eyes, whiskers, and tail rather than relying on one feature. For a calm drawing, use a loose body, forward relaxed ears, soft eyes, relaxed whiskers, and a gently resting or upright tail. For a curious cat, turn the ears forward, open the eyes, and lift the head.
A frightened or defensive real cat may crouch, flatten the ears, widen the pupils, arch the back, or puff the fur and tail. Those shapes can create a dramatic cartoon, but they also mean the animal needs space. Never pose, hold, chase, or startle a cat for a reference. Use a photo or draw a familiar animal from a respectful distance.
Try a sleepy version by closing the eyes and wrapping the tail around the paws. Try a playful version by lowering the chest, raising the rear, and curving the tail. Try an alert window-watching cat with a tall neck, forward ears, and the body turned slightly to one side. These changes teach storytelling while reusing the same basic shapes.
Common Problems and Easy Fixes
The face looks uneven
Return to the faint centerline and eye guide. Compare the distance from each eye to the center, then check that the nose sits below the midpoint. Fix one feature at a time. Perfect symmetry is unnecessary, but shared guides keep the expression intentional.
The cat looks like a bear
Sharpen the ear silhouette, make the nose smaller, and add a clear tail. Give the muzzle two small rounded pads instead of one large projecting oval. Long whiskers and narrow catlike pupils can help, but the triangle ears and flexible tail do most of the work.
The paws look crowded
Draw one light ground line and place all four paws on it. Make the front paws narrow and the back paws wider. If the center feels busy, hide part of the back paws behind the front legs instead of outlining every toe.
The pose feels stiff
Add a gentle action line from the top of the head through the chest before drawing the body. A perfectly straight vertical can feel formal; a slight curve suggests weight and attention. Tilt the head, shift one ear, or wrap the tail across the paws to break the symmetry.
How Grown-Ups Can Help
Demonstrate on a separate sheet instead of redrawing the child’s cat. Ask observation questions such as “Which shape is widest?” “Where does the tail begin?” or “What would make this cat look sleepy?” Describe useful choices—“You made both paws meet the ground line”—rather than judging whether the drawing matches the sample.
NAEYC’s guidance on children’s creativity distinguishes open-ended process art from projects with one predetermined correct result. A step-by-step lesson can still leave room for invention. After the construction is finished, let the child choose the cat’s pattern, expression, name, favorite place, or imaginary job. That choice turns a shared recipe into original art.
A 10-Minute Cat Drawing Practice Plan
- Minute 1: look at a cat photo and name the six biggest shapes.
- Minutes 2–4: place the head, ears, body, haunches, legs, paws, and tail lightly.
- Minutes 5–6: connect the outer contour and add the face.
- Minutes 7–8: erase extra lines and add one clear fur pattern.
- Minutes 9–10: draw a tiny second cat from memory in a new pose.
The second drawing is important because it asks the child to remember the recipe instead of copying every edge. On another day, repeat the lesson with a curled sleeping cat, a side view, or a long-haired tail. The step-by-step practice guide explains how to move from guided construction to independent drawing, and the animal drawing hub offers more subjects.
If proportions cause frustration, an adult can help with a brief assisted first pass. Trace or place only the head and body shapes, hide the guide, and finish the face, fur, paws, and setting freehand. The AR drawing app guide shows how to use a reference as a bridge and then redraw from memory.
Draw One Cat, Then Invent Another
An easy cat drawing works when the child can recognize the big shapes, finish the silhouette, and make a personal choice. Start lightly, solve the pose before adding fur, and use the ears, paws, whiskers, and tail to make the subject clear. If the first cat looks unusual, give it a name and draw its friend.
For the next challenge, draw the cat asleep in a circle, peeking from a box, watching a bird, or stretching with its front paws forward. The familiar shape recipe stays useful while the new pose develops observation, memory, and visual storytelling.
Open How to Draw for animal lessons and guided references, then make a quick freehand cat from memory.
Related Drawing Guides
- Explore How to Draw lessons and drawing tools
- Find more easy animal drawing ideas
- Explore beginner-friendly drawing tools
- Use the step-by-step drawing app
- How to Draw Animals for Kids: Easy Step-by-Step Practice
- How to Draw a Dog for Kids: Easy Step-by-Step Guide
- How to Draw for Kids: Easy Ideas That Build Confidence
- How to Draw Step by Step: Beginner Practice Plan
- Fun Drawing Games for Kids at Home